





Location Steel Citadel
Quests
In Steel Citadel quests take place here:
| Type | Quest name | Lv | Start | Reward |
|---|---|---|---|---|
  |
Target of Opportunity Olympiad Veteran |
85 | Grand Olympiad Manager (Grand Olympiad Manager) Frontier |
 Seal Breaker - 5th Floor Seal Breaker - 10th Floor |
| Steel Citadel | |
|---|---|
| Territory: | Gludio Territory |
| Before editing this location (fixes, additions), please read the location reference guide | |
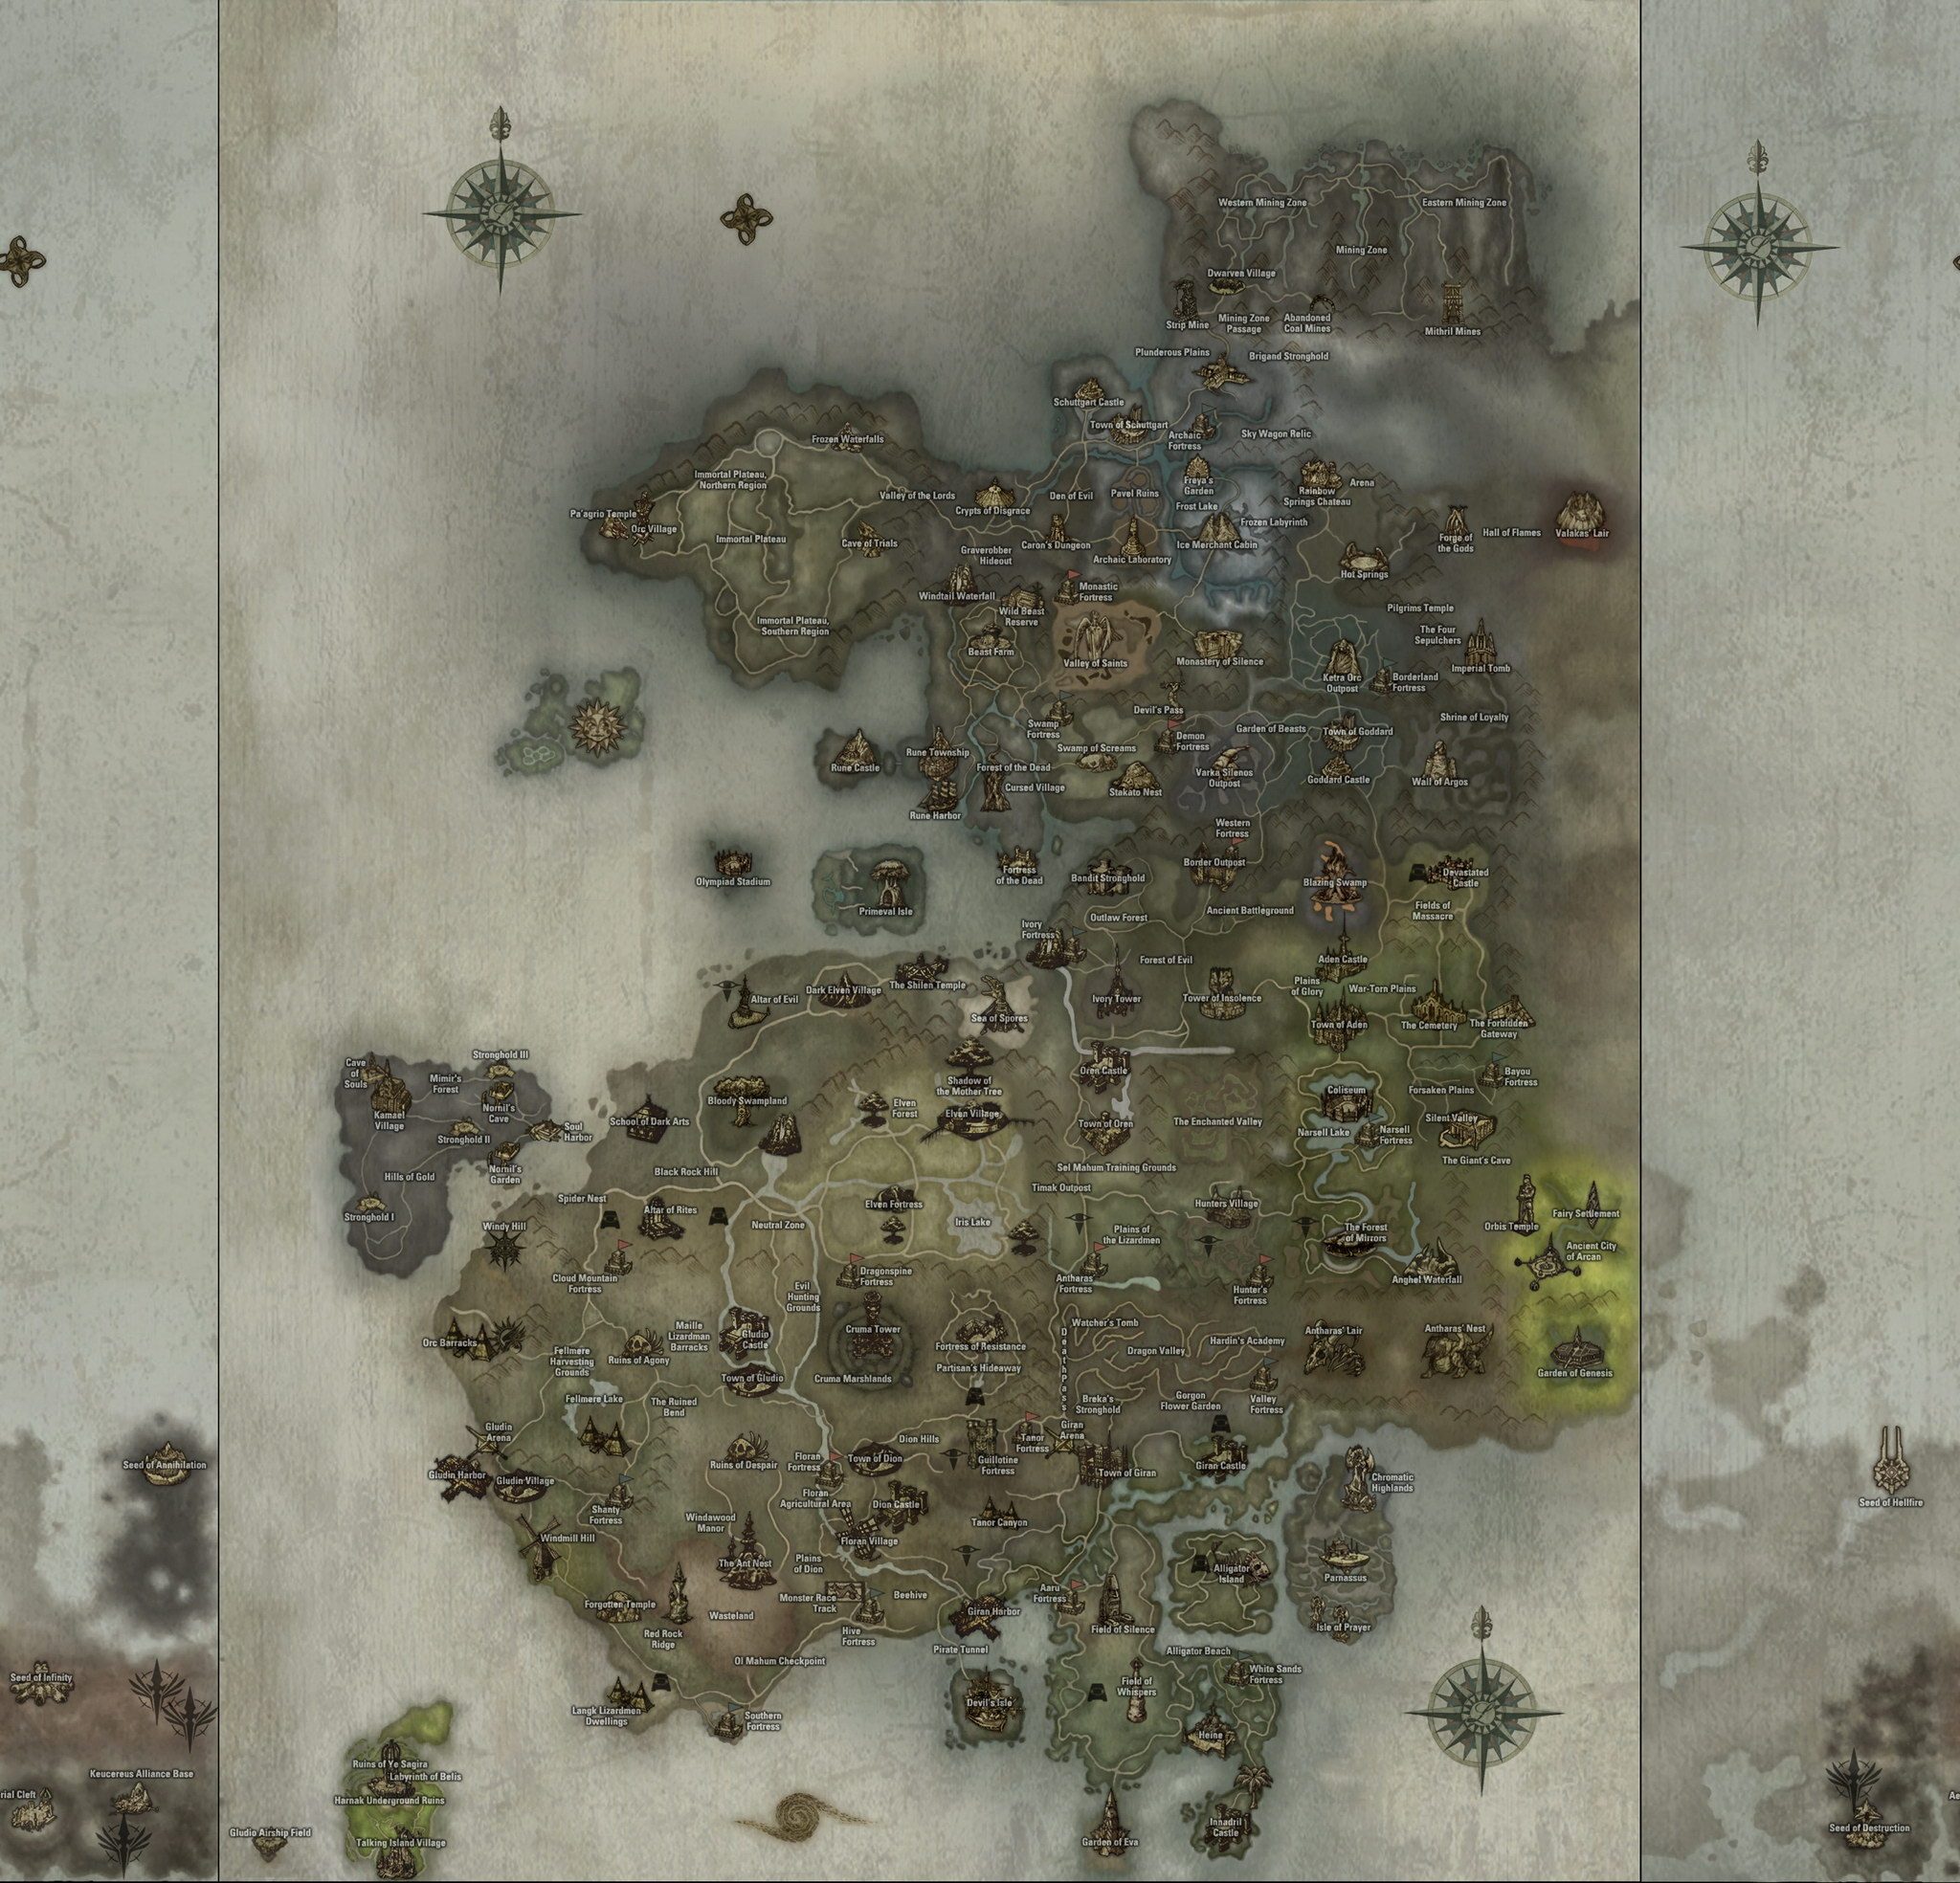
A dot marks the place on the map. Drag the map with your mouse or finger.

Monsters
- Gegei (70, Lv. 82)
One of the most XP-rich places in Hellbound is Steel Citadel. It's a place full of dangers and surprises, and at the same time the most convenient and optimal place to obtain S80 gear. Entry is available from Hellbound level C 10.
Base Tower
This is where players end up right after the instance town. The tower's basement consists of the Anterum, wide corridors and a labyrinth.
Anterum
The place where players end up right after teleporting inside. It's a spacious hall with several doors and 3-4 groups of Body Destroyer.-type mobs. The first player to attack one gets Death Sentence Curse: dies within 30 seconds unless the mob is killed. Keys drop from this mob: Gate Key: Destruction or Gate Key: Darkness. These keys open the doors on the left or right side of the Anterum. There are 2 paths through this tower: a short one and a long one. Gate Key: Destruction lets you take the short path.
Labyrinth
As you go through the labyrinth, keep heading north. Sooner or later you'll run into the mob Labyrinth Seer; it has root skills, a dark attribute attack, ranged attacks and close-range AoE. It drops Gate Key: Blood. This gives access to the next part of the labyrinth. After wandering the labyrinth you'll get into a big room with the mini RB Guzen, which has a dark close-range AoE attack. After killing it you can go up a gentle slope to floor 2 of the tower.
Floor 2 of the tower consists of corridors and rooms. Group mobs live here: Passageway Captain, Passageway Guards and those social to them, Passageway Mystics. The mystics burn MP very seriously. These mobs drop Fiery Demon Blood, with which you can get into the main halls of tower 1 (these potions last 10 minutes, so you must plan for the whole party to get into tower 1 at the same time). Mobs on floors 1 and 2 drop items for the Mattress shoulder pad quest (red gem).
Tower of Infinitum
You can get into this Tower only if Hellbound has reached level 11. The tower has 10 floors. To get from floor to floor you can either hunt mobs as usual or use the tactic of beating a mob with your fists (it depends on your goal — either XP or completing the quest for access to Tully Workshop).
While on floors 1-4, when teleporting there's a chance to go up 1 floor or go down 1 floor. Players can determine the floor as follows:
- floor 1: 1 green ring, monsters: Cosmic Scout
- floor 2: 1 green ring, monsters: Cosmic Scout
- floor 3: 2 green rings, monsters: Cosmic Scout, Cosmic Watcher
- floor 4: 3 green rings, monsters: Cosmic Scout, Cosmic Watcher
- floor 5: Demon Prince
- floor 6: 3 yellow rings, monsters: Cosmic Priest
- floor 7: 3 yellow rings, monsters: Cosmic Priest, Cosmic Lord
- floor 8: 2 yellow rings, monsters: Cosmic Priest, Cosmic Lord
- floor 9: 1 yellow ring, monsters: Cosmic Priest, Cosmic Lord
- floor 10: Ranku
Demon Prince

The head of the monsters guarding Tower of Infinitum on Darion's orders, considered a high-ranking noble in the demon world. Players can run into him on reaching floor 5. Attention: from this point players must avoid leaving combat mode, otherwise they'll be teleported back to floor 4. If there's no boss, you have 10 minutes to rest, and then you'll be sent to floor 6.
When the RB has little HP left, he starts using UD. He also summons a self-destructing minion with an AoE attack. He also casts the debuff Imbue Dark Seed, which takes HP almost instantly. Cured with Cleanse.
After killing him you'll be teleported to floor 6.
Ranku

A monster summoned by Beleth, just like Darion. Under the contract, he's responsible for the invasion of Hellbound. Attention: from this point players must avoid leaving combat mode, otherwise they'll be teleported back to floor 9.
Ranku appears with 4 minions: Ranku's Scapegoats. From the moment you attack the RB, their HP gradually starts dropping. The EE's or Bishop's task is to heal them. Otherwise the mob Eidolon appears, which is rather hard to kill.
After killing the RB you can leave Tower of Infinitum. Attention: once you've done the quest Matras' Curiosity and got the items from the RB, you can get into Tully Workshop via the NPC Deituva, skipping the basement and tower 1.
Tully Workshop
After you leave Tower of Infinitum and go through a few turns, you'll reach a place similar to Pagan Temple in Rune. There you'll meet NPC Dorian. However, if you've done the quest Matras Curiosity and brought the dwarf 2 blueprints, you can find NPC Deituva near the outer gates of Citadel of Steel, who will teleport you straight to Dorian. Dorian will teleport you to Tully Workshop.
Tully Workshop consists of 8 floors, where you'll find key monsters, secret doors and ways to access other floors.
Floor 1
Each room on this floor has group mobs that need to be killed. You can kill them or use DoS to get to the room with the staircase, which leads to the walkway running around all the rooms of floor 1.
Master Zelos is the key monster of floor 1. After killing it, a secret door to floor 2 opens. Zelos's room is isolated.
Floor 2
You need to kill some mobs to find the secret door to floor 3 in one of the rooms (or use DoS).
Floor 2 consists of several rooms that open into a round central room. The secret door is in one of the corners of one of these rooms
Floor 3
This room consists of a walkway running around the room. From this walkway several passages lead to the central platform, where the key mob Master Festina. stands. To get to floor 4 you need to kill her.
Before killing her (and you can't kill her right away, or all the mobs on the floor will aggro), you need to kill all the mobs standing on the walkway around the room.
Floor 4
The best place for XP in the tower. In one of the corners of one of the rooms there's a secret door to floor 5.
The tactic is the same as on floor 2, since the floor layout is the same as floor 2.
Floor 5

This floor is a labyrinth. You need to go through it, kill the RB Tully and go on to floor 6.
The labyrinth consists of corridors and a central room; in each corridor there's an obelisk Tully Gatekeeper. When activating it, there's a chance the activation fails and the door won't open. You need to wait a few minutes to activate it again.
If there's a Warsmith in the party, activation won't fail. If the RB Tully isn't in the central room, you keep going through the labyrinth looking for NPC Old Dwarwen Ghost to get to floor 6. If you killed the RB, then
- Ingenious Contraption appears, who gives out the Tully's Platinum/Tin/Lead/Zinc/Copper Medals needed for later access to Anomic Foundry
- You need to find NPC Old Dwarwen Ghost within 10 minutes, otherwise the debuff Demon Fire appears, eating 2k HP every 3 seconds.
However, you can kill Failed Experimental Timetwister Golem to extend the time limit.
The Old Dwarwen Ghost will also give information on how to get into Tower of Naia.
Floor 6
The floor's structure is the same as floors 2 and 4. You can stay on it or teleport to floor 8 via Teleportation Cube.
If you decide to stay on floor 6, here's what awaits you:
This floor has group mobs The Original Sin Warden and 7 Slave Monsters: Slave of Gluttony, Slave of Sloth, Slave of Pride, Slave of Wrath, Slave of Lust, Slave of Greed, Slave of Envy. The Sin Warden minions self-destruct with a radius of about 600. The mobs are very troublesome and can wipe a whole party.
After killing several Sin Wardens, Darion's Faithful Servant. appears. After killing several Darion's Faithful Servants, NPC Mysterious Agent. appears.
This NPC can teleport you to the secret floor 7.
Rough figures: for Mysterious Agent to appear, it took about 3 hours of killing mobs. About once every 5 groups of Wardens, 1 Servant appears; once every 10 Servants, 1 Agent. spawns.
Floor 7
the structure is similar to floor 3. A walkway around the hall with several ramps leading up to the central platform.
On the central platform stands NPC Mysterious Agent. If you take the quest from the agent, you can get an hour-long buff that greatly increases P. Def., Schield Defence and defense against Dark Attack.
Next to the Agent stand 3 Darion Challengers:
- Temenir - a mob with strong attack power
- Draksius - a monster with strong defense
- Kiretcenah - healer/mage
These 3 mobs, like Darion, signed a contract with Beleth. They don't like Darion, but can't kill him because of their contract obligations, so they hired Mysterious Agent to kill the minions of Darion. If you support the agent's request, you'll be teleported to Darion as an assassin; if you refuse the agent, 3 mobs will attack you to kill you and keep the plot against Darion secret.
If you kill Challengers, you'll be teleported to the roof.
Floor 8
its structure is similar to floor 6. You can get to the roof via Teleportation Cubic, or go down to floor 7 for the buff.
Roof

Access to Tower of Naia and General Darion's command post.
The RB Darion and Floating Ghosts. live on the roof. You can get there from floors 5, 6, 8, or with the buff from floor 7. Floating Ghosts are the souls of humans and elves eaten by Darion. Unlike Darion, they hardly attack.
Soul Crystal Pillar: after you hit it, NPC Ghost of an Old Dwarf appears, and you can get into Tower of Naia the same way as on floor 5.
When Darion is killed, a secret passage to Tower of Naia. opens. It can be used until Darion respawns.
I have very little information about access to Anomic Foundry, so it's not in the guide yet.
Tower of Naia
You must attack the lock on the tower roof. When the lock's HP drops to 10%, you need to activate the controller, and you'll be teleported to a safe zone in front of the instance. During the attack on the lock, Ward. mobs appear. They're vulnerable to attacks of the 4 main elements but have 16 million HP, so you need to either sleep them or paralyze them.
If you activate the controller too early, it disappears, and you'll have to wait a while for it to respawn.
So you're in the tower's safe zone. Ahead of you is an instance where you must spend no more than 5 minutes in each room, otherwise you'll be sent back to the tower roof. Only 1 party can do this instance at 1 time. The instance has 3 floors with 4 rooms each. In the center of each room stands Ingenious Contraption, which you need to click to make the mobs appear.
Once a party enters each room, its entrance door closes and there's no way back.
- Room 1: Beleth’s Follower, Beleth’s Devotee
- Room 2: Beleth’s Assassin
- Room 3: Beleth’s Minion
- Room 4: Beleth’s Assassin. Attention: when the mob's HP drops to 50%, it starts running around the room aggroing other mobs.
- Room 5: Beleth's Retainers. The mobs set Spellhowler's Death Link on players, which gives a pain effect (the harder you hit the mob, the more damage the player takes from the mob). They also like to use dark close-range AoE attacks with a high crit rate. In addition, the room has 2 kinds of Beleth's Devotees with a very strong dark AoE physical attack and the ability
to summon a player to themselves. After killing Devotee, the mob Beleth's Fighter appears; by killing it you can get to floor 2
- Room 6: here Beleth's Projection. awaits you. These are healer mobs with a self buff similar to the Ogre totem. They also have a long-range AoE physical attack and a stun.
- Room 7: identical to room 5
- Room 8: Similar to room 6, with one peculiarity: a constant poison debuff.
- Room 9: Beleth’s Minion with the peculiarity of the Beleth's Devotee mobs
- Room 10: Similar to room 6, with one peculiarity: a constant fire debuff
- Room 11: here you'll meet a new mob: Beleth's Low Servant. This mob casts paralysis and movement speed reduction debuffs.
- Room 12: Beleth's Slaves. They use targeted dark attacks and non-elemental close-radius AoE attacks. They have 29,293 HP and a self-destruct effect.
After that, you can meet Mutated Elpy and get into Core of Naia.
Core of Naia
So you've entered Core of Naia, the RB kill zone. This is the zone where you must wait for all the other parties going through the instance in the last tower (12 rooms). Only one party every 20 minutes can get through the 12 rooms. This means you must wait until at least the 200 people needed to kill Beleth gather. If even one party member disconnects for any reason, the WHOLE party is teleported to the Mattress. So, just in case, gather more than 200 people. The minimum requirement for the RB to spawn is Epidos 27 people. When everyone has gathered, hit the NPC in the room. It dies, and Naia Spores. respawn. From this moment the door closes and no one else can enter.
There are 4 kinds of spores, representing 4 elements.
All spores resist Sleep, Hold and Paralysis. They use targeted melee skill attacks and have serious attack power based on the element they represent.
In the spore zone you need to build up the so-called Epidos Index. It's built up by killing spores of a certain attribute. Killing a spore of the opposite element lowers the index a lot; killing spores of another kind lowers it slightly.
When Epidos Index rises to a certain level (about 30 minutes), all spores run to the center of the room, where they merge into Epidos of the element opposite to the one whose index you were building up. Raising the index is a very non-trivial task.
All Epidoses resist bows and have an attack of the element they belong to: they cast debuffs that lower attribute resistance and use attribute DoT attacks.
Between the moment the index is finally built up and the Epidos spawns, you won't have time to regenerate MP or rest. Besides, the Epidos kill zone will have an HP-reducing debuff. So EEs with blessing of Eva will be very necessary.
After killing the Epidos you can get to Beleth.

